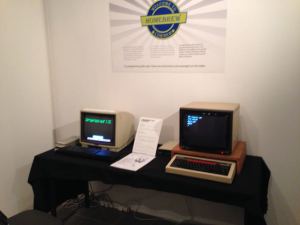
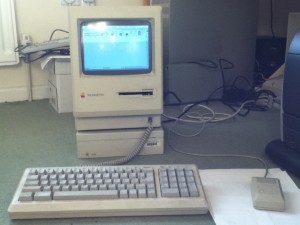
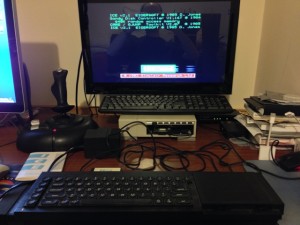
Retro-review: British “business” computers of 1985. The ACT Apricot F1 vs. Sinclair QL.

In 1984 Sir Clive Sinclair announced the QL as his answer to a “business computer”, costing £399, and the year later ACT released their follow-up to the Apricot PC, the F1, in a stylish new slim design with such innovations as wireless (infra red) keyboard and mouse (actually a track ball), costing around £3000.

Seeing as I’ve been rebuilding an Apricot F1 and I have a couple of QLs I thought I’d give a comparison review of the two machines side by side.

Well, back in 1984 when the Sinclair QL came out, to put it mildly, everyone poured scorn on the machine as a “business” computer. After all, where were the floppy drives? Did it run Lotus 1-2-3? Of course, the price played very little into this discussion as all the “business” machines were many multiples of the cost of a base QL. Having played with its direct(?) competition I think I can make a better comparison. (I’ll cut to the chase, in terms of speed and convenience, the QL wins, but with some pretty important gotchas.)

1. The Sinclair QL

The QL comes out of the box with 128K of RAM, two 100K Microdrive drives and the set of pretty decent office applications from Psion, including word processor and spreadsheet. If you want to add a monitor that costs you extra, adding a couple of hundred pounds to the cost, then add the printer for another £100. So, for a working “business” system you’re probably looking at £700-ish in 1985.

In terms of convenience, you plug it all in, switch it on and you have a working system. You probably want to buy a set of Microdrive cartridges which I seem to remember retailed at about £5 each and then make working copies of the Psion Exchange suite.

Popping an application cart into the first drive and a file cart into the second drive, resetting and hitting F2 to boot would bring you to the Quill word processor in about a minute.

In terms of speed, the text update is slow relative to IBM PC-XT clones of the day due to the bitmapped graphics, but they were well out of the price range costing many thousands of pounds. However, for a word processor the screen update was adequate and Quill was definitely up there with the early versions of Wordperfect etc. in terms of functionality.

With respect to the much maligned Microdrives, they were slow to “seek” to find a file but could be surprisingly fast to load one if the data was contiguous on the tape as the transfer rate is technically higher than that of standard double-density floppy drives.

The biggest down side of the QL, however, is that it doesn’t have a separate keyboard. With everything being in the same unit it makes ergonomics poor as it’s difficult to move the unit to a comfortable position. Not that ergonomics was really a thing back then. The keyboard itself wasn’t brilliant to type on either. It’s an early iteration of the plunger and membrane keyboards most systems use today but it’s just clunky. The lack of a dedicated delete key is another large omission.

Expansion of the machine was possible with, by the time of 1985, both memory upgrades and floppy disk interfaces available. However, they added to the cost and the number of cables attached to the keyboard making ergonomics even worse.

2. The ACT Apricot F1

The F1 was a follow up to the Apricot PC, which was a boxy luggable desktop machine. The new F1, had a stylish clean, new design and, unlike its sibling, a single 3.5″ double density floppy disk drive built in. It also had an innovative (but ultimately problematical) infra red wireless keyboard. Again like its sibling the time of day clock was held in the keyboard and not in the main unit, so to set it you had to hit a key after each reboot.

The F1’s keyboard keys actually looked very similar to the Sinclair QL’s, being a flat square with a raised circle. Apparently this keyboard didn’t have a great feel to it either, being replaced with the version with more normal key caps and a better mechanism for the later F2 and F10 models.

The Apricot machines were based upon an Intel 8086 processor clocked at the same speed as the 8088 in the IBM PC-XT. It would have been expected therefore that they would run more quickly due to the data and address buses not being multiplexed 8 bit ones but this is not the case as memory accesses were interleaved with the video circuitry slowing the whole system down to the same speed.

Although the Apricots did run MSDOS (2.11) they were not at all IBM PC-XT compatible. Any software which didn’t use standard MSDOS calls only wouldn’t work and the screen display access was completely different so applications would have to be specially ported to the platform. Later ACT did create a compatibility shim application which added at least MDA/CGA display access via software emulation but it was very slow.

To do any graphics you have to load the Digital Research GSX graphics subsystem and use call to this, if you wanted your application to run on all the Apricot machines, as the graphics hardware on each was very different.

So, what did you get for your £3000 F1 system? Basically, you got the machine, a wireless keyboard and MSDOS 2.11 with the “Activity” graphical user interface. The machine had a composite video out port as standard, along with the proprietary 9 pin RGBI port. If you wanted a monitor then at was a couple of hundred pounds extra for the 9″ monochrome display and a lot more for the 12″ colour one. If you wanted applications then they were extra, a couple of hundred pounds extra for each. There was a native port of Wordstar for your word processing needs and a spreadsheet, which I’ve not found as a floppy image on the ‘Net.

So, what was the user experience like?

Well, when you powered the unit on (with a power switch, something the QL lacks!) it comes to the “BIOS” screen which is quite nice. You then have to hit the “TIME/DATE” key on the keyboard and put the OS floppy into the machine. The machine will then (slowly) boot MSDOS and bring you into the “Activity” GUI, which you have to navigate using the number keypad (You didn’t pay that extra £100 quid or so for the “mouse” trackball which isn’t used by anything did you?). Ejecting the OS floppy and then putting the application floppy into the machine will allow you to start the word processor. Yes, there’s lots of disk juggling going on due to the single drive.

So, after about 5 minutes you will probably be into your application.

The screen display update speed is very similar to that of the QL as there’s no hardware acceleration other than scrolling. The graphics capability of the machine is actually almost identical to that of the QL.

With the base system only coming with 256K of RAM and the OS being in RAM as well the working memory is actually less than the base 128K QL.

As for expandability, there is a slot internally for upgrades and another on the side. There was a 10MB “Winchester disk” external unit which would probably cost you almost as much as the machine in 1985. There was no option to add an external floppy drive, though the hardware is capable and it would have only meant them adding a header on the motherboard as the clip-out panel in the case was there ready. Even with a two floppy drives MSDOS is painful to use though.

3. Conclusion.

Well, to be honest it’s six of one and half dozen of the other actually. In terms of speed the 7.5MHz 68008 in the QL, hampered by its multiplexed 8 bit bus, is about the same as that of the Apricot with its 4.7MHz 8086 in use. The single floppy drive is a major problem when using the machine and it “feels” slower than the Microdrives not because of the data rate (600rpm drives make the data rate far higher) or the latency, which is far less, but because all accesses are in the foreground and you have to swap disks so much more often. It makes even copying a file from one floppy to another a major task with four disk swaps per file. In this way the F1 is far less usable.

However, the separate keyboard, irrespective of the problems with the wireless nature, is far better than the “all built into the keyboard” form factor of the QL.

Anyway, if the purchase price wasn’t a decider, given my experience operating the two machines today I find the experience with the base QL far superior and I would have preferred to use that.

The Apricot F Series with more memory, hard disk and the later release of the GEM graphical front end does make the machines a world better, but Apricot (rebranded from ACT in 1986) soon dropped them in favour of PC compatibility, and a price hike, and the innovative British business PC era came to an end.

EDTracker Setting Up and Use with Elite: Dangerous

Over last weekend I attended the Lavecon event just outside Northampton. This event came out of the fan response to the development and release of Elite: Dangerous from Frontier Developments and started off a couple of years ago as merely a get-together of those who produced the Lave Radio show and a few others. It’s now a quite large two day convention.

Anyway, displaying (and selling) there wares were the team who have been creating a low-cost head tracking device, called EDTracker, which allows the wearer to change the view in a compatible game according to the direction that their head is pointing. This gives a rudimentary “virtual reality” experience without the head mounted display. Seeing as the latest “Pro” unit, which contains a magnetometer as well as accelerometers, was on sale for £40 I thought it worth a try and bought one.

Given the slightly fiddly nature of the set up and the EDTracker web site not having an up-to-date set-up procedure I thought I’d write my own set of set-up instructions from the point of view of a user rather than a developer and put everything in one place.

Setting up the EDTracker Pro for the first time.

Setting up the hardware:

EDTracker ProThe first thing that you need to do once you get the device out of the box is to mount it on some sort of head gear. Most people fit it to the top of some headphones as they’ll be using those with the game anyway. At Lavecon EDTracker were selling rubber bands to do the job, but you may want to use something more permanent.

Fit the unit on the top so that it’s level when you wear the headphones and with the USB port pointing towards your left ear. Contrary to common sense, the box needs to be fitted with the screws uppermost.

Now sit the headphones on something so that the device is level and stationary. I found that hanging them upon my joystick worked well.

Plug the USB cable into the device and secure the cable to the side of the headphones headband so that it doesn’t pull on the box and make it move. Then plug it into your PC.

Windows will now detect the device and attempt to load a driver. Ignore any advice on the EDTracker website about the rest of the set-up as this is NOT for the Pro model.

After a while Windows will tell you that it’s installed the driver. This can take a number of minutes, so be patient.

If you now open the “Devices and Printers” tool in Windows you will now see a new gaming device, the EDTrackerPro. The Pro pretends to be a joystick.

Setting up the software.

You will now need to download some software to configure and use the device. Unfortunately the EDTracker website download section is not really helpful here and is hard to navigate but what you need is the EDTrackerPro GUI. (Click on the link to download it.)

To work with Elite: Dangerous without further configuration of the game you’ll also need opentrack 2.2.

Neither of these pieces of software use a Windows installer, so it’s easiest if you create an EDTracker (or some other folder) on your desktop and unzip them within that for easy access as you’ll need both of them every time you want to use the device.

Once you’ve done this go into the EDTrackerPro_GUI folder and run “EDTrackerPro”

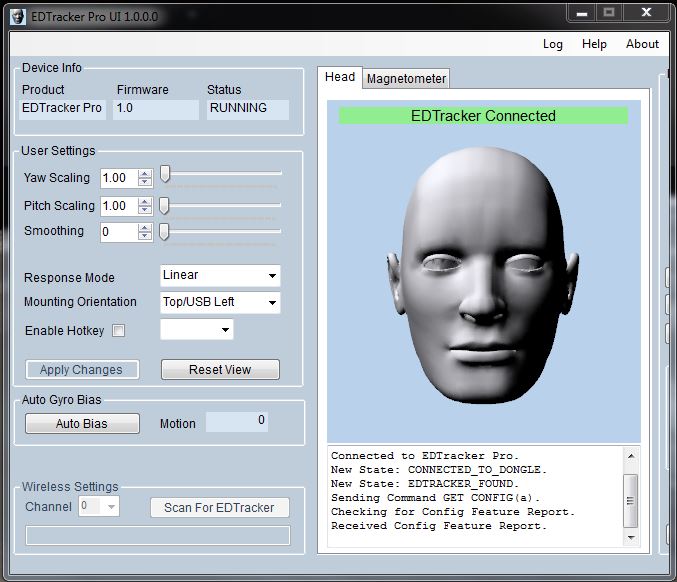
A window should now open with a green bar over the top of the bald head saying “EDTracker Connected”.

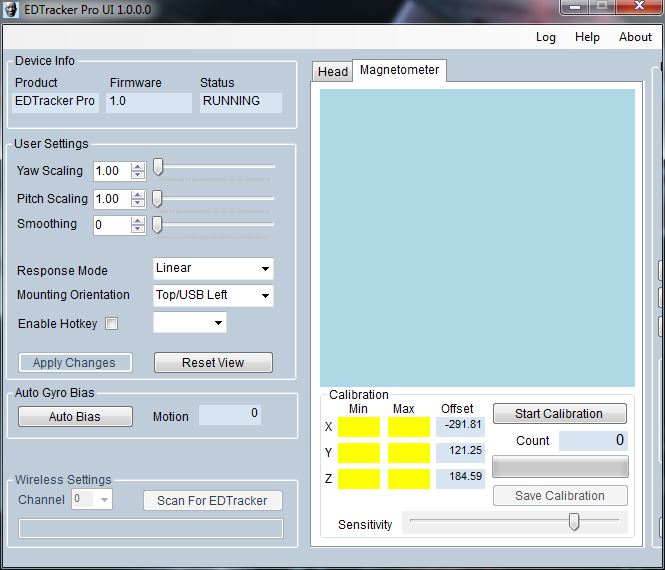
EDTrakerPro Main WindowChange the settings so that they match those in the above figure. Now click upon the “Magnetometer” tab and the display will change…

EDTrakerPro Magnetometer DisplayYou now need to calibrate the magnetometer within the device so that it can use the local Earth’s magnetic field as a reference to prevent the tracking drifting over time. Once you click on “Start Calibration” a video will pop up in a new window showing you what you need to do. Basically it involves rotating the headphones 360 degrees in each orthogonal direction so the local magnetic field can be mapped. Pick up the headphones and do this a few times and then click on the “Save Calibration” button. You should only need to do this once for each location you use the device in. If you always use it in the same place then you only ever need to do it once.

Now click back on the “Head” tab to get back to the original view and hang the headphones back on the joystick, or whatever you have been using. Without touching the headphones click on the “Auto Bias” button. This will allow the system to calibrate the accelerometers so that they don’t drift.

Put the headphones on, look straight ahead and click on the “Reset View” button to set the “centre” position.

Right. That’s the device configured, now for the interface software for the game. You can close the EDTrackerPro program.

Navigate to where you unzipped opentrack and then down to where the program files are lurking. Run the “opentrack” program. This will need to be started and kept running whenever you wish to use the EDTracker Pro within Elite: Dangerous as it provides the software glue.

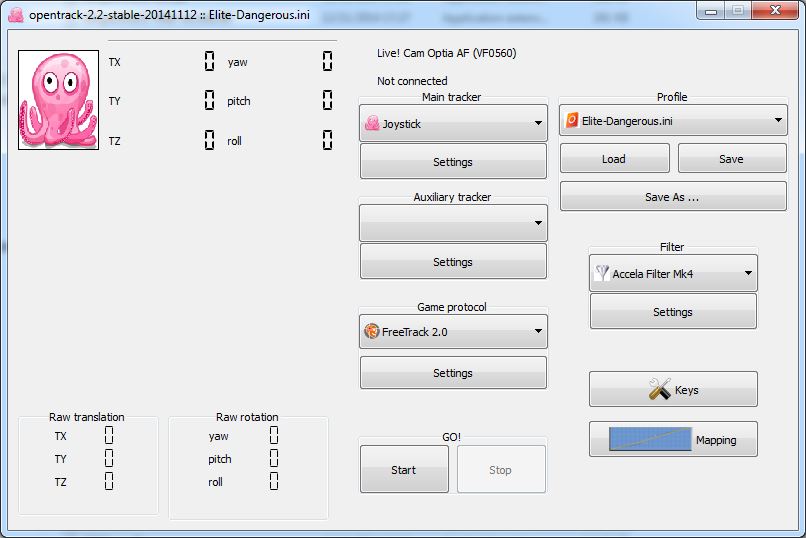
opentrack-1To begin with opentrack will not see the EDTrackerPro but may show the name of your webcam. Under “Main tracker” click on the top button and select “Joystick”. Now click on the “Settings” button and you should be able to select “EDTrackerPro” from the list.

Now, under the “Game protocol” section select “FreeTrack 2.0” as in the figure above. So as to damp any small fluctuations due to reading errors and the like select the “Accela Filter Mk4”.

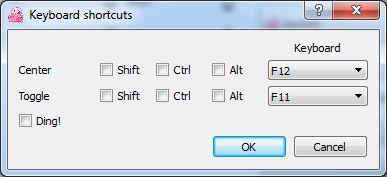
opentrack-keysClick on the “Keys” button to set the hot keys to turn the tracking on and off and to re-centre. I’ve chosen F12 and F11 in the above example. Click “OK” to return to the main window. You can now click on the “Start” button.

We’re not finished yet as at there is no mapping between the EDTracker’s motion and the output of the program. To set this up click on the “Mapping” button.

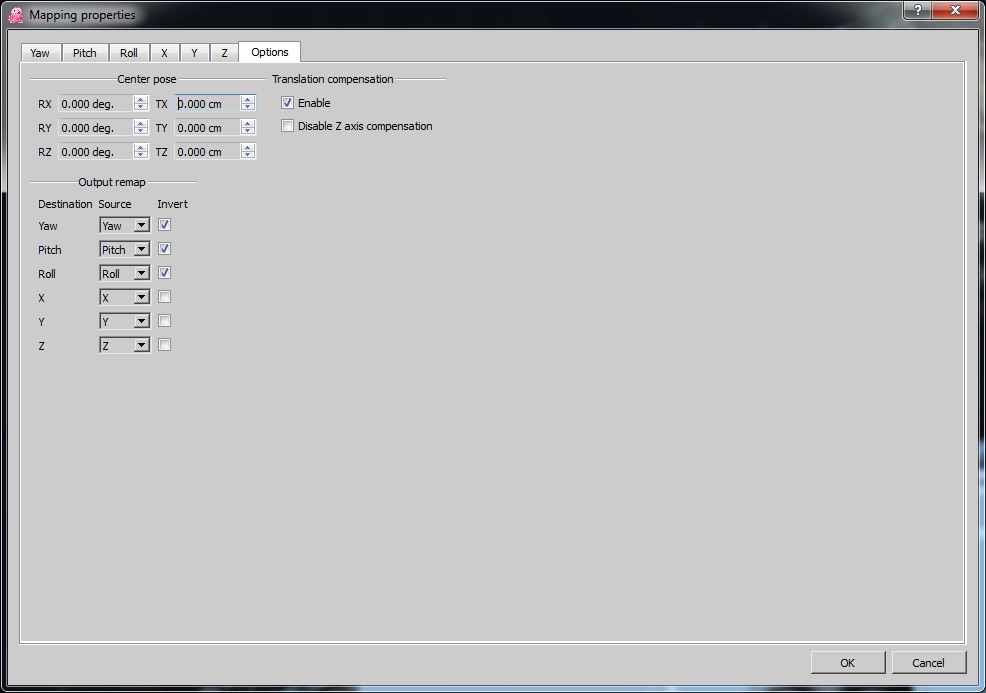
opentrack-output-mapping-optionsFirst select the “Options” Tab. Tick the “Invert” box for each of the three axes.

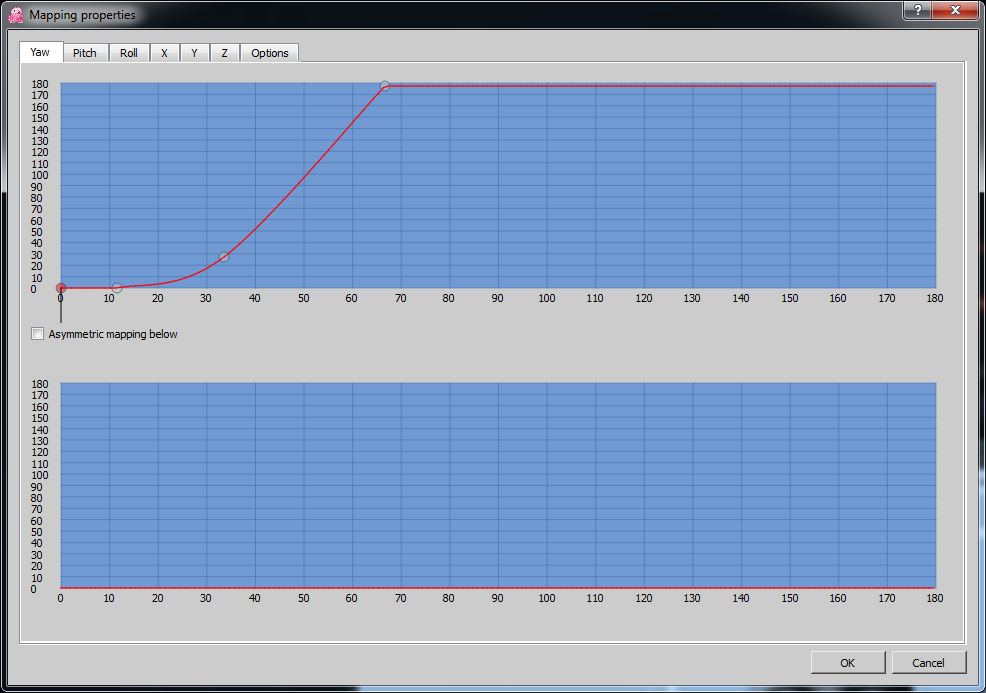
opentrack-yawNow click on the “Yaw” tab. Put your mouse pointer in the bottom right corner of the top graph, click and drag upwards. You will see a point and a line move with your cursor. The diagonal line is the mapping between the input value from the EDTracker’s Yaw axis and the output of the program. You can create more control points by clicking on this line and then you can drag them to make a curve or increase the sensitivity of the tracking. The curve I’ve created in the figure above gives a dead zone close to the centre so that small head movements when looking around the cockpit at the front don’t cause any motion and then a smooth motion after that to a full look to the left or the right by turning my head ~65 degrees.

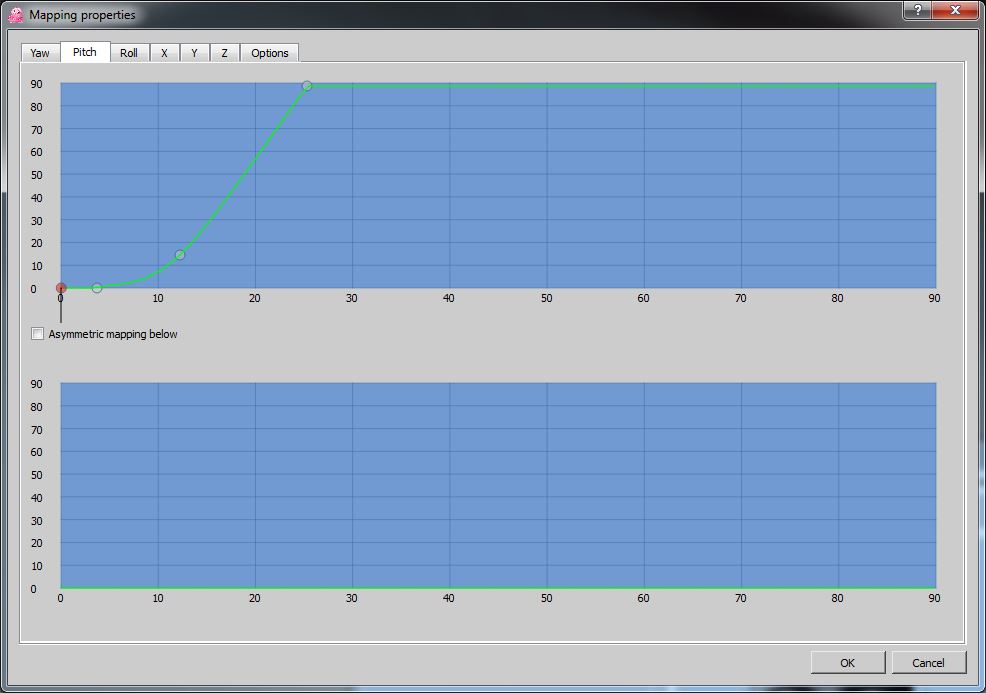
opentrack-pitchSimilarly you need to do the same for the “Pitch” axis.

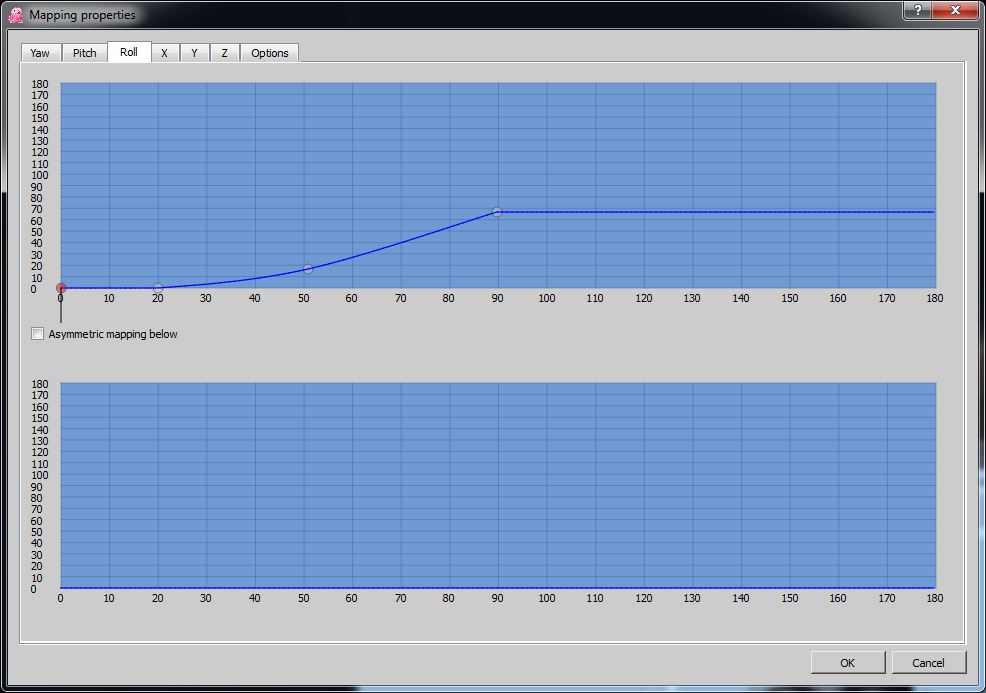
opentrack-rollAnd finally for the “Roll” axis. I found that the roll was giving me problems and so I decreased the sensitivity greatly.

You can now close the mapping window and save the settings. I created an new settings file for Elite: Dangerous, a copy of which you can download here.

You can now start Elite: Dangerous and the game will automatically use the head tracker! No configuration is necessary. It’s best to test it out using the first of the tutorial missions. You can change the mapping, as above, to suit your tastes.

Note: If you have issues with the mappings bouncing around or being 90 degrees out it’s probably due to Windows “calibrating” the “joystick”. Go into the “Devices and Printers” tool, open the properties for the EDTrackerPro and reset to default. This should sort it out and was discovered at Lavecon by one of the EDTracker team when I had issues.

Day-to-Day Use.

Every time before you use the EDTracker Pro you will need to do the following:

  • Run the EDTrackerPro GUI program, hang the headphones up as above and run the “Auto Bias”
  • Only if you are in a new location you will need to re-calibrate the magnetometer.
  • Run the opentrack program and click on the “Start” button.

Once you’ve done this you’re ready to run Elite: Dangerous and play!

[Edit: 2015/11/15 12:10 GMT]

I’ve now uploaded a new version of my OpenTrack configuration file without any real dead-zones. I’ve been using this for a few months now and it works well and doesn’t have a real dead-zone in the centre and also doesn’t give me any motion sickness effects.

[Edit: 2016/01/24 09:45 GMT]

Changed link to software to point to the new Pro website, http://www.edtracker.co.uk/

[Edit: 2017/02/18 15:40 GMT]

Updated link to EDTrackerPro GUI installer to point to the latest MSI installer version.

This is the Age of the Train… again?

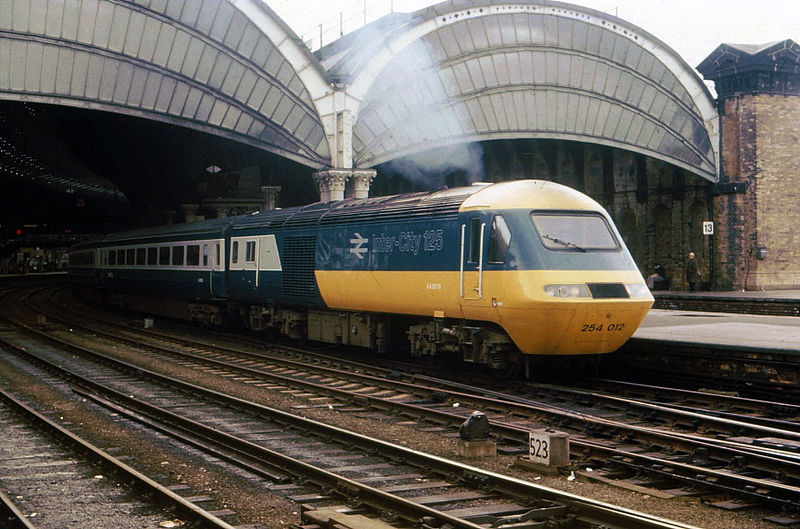
Inter-City 125 at YorkHaving been interested in the railways since the mid-1970s it was with some interest I saw an article on the BBC News web site today about the replacement of the old “Inter-City 125”, or “High Speed Train”, trains with new Hitachi units.

Now, most of the article was fine but there was one sentence in particular which was down right wrong in the caption for a photo, and that was, “With its familiar sloping nose, the 125 symbolised a new era of clean lines and high technology on a network that had been underfunded and getting tatty for decades.” This is not how things were at the time and here’s why:

The HST, or “Inter-City 125” as it was marketed, came into service in 1977 on the Great Western Mainline between Paddington and Penzance. This was less than ten years after the last of the modernisation era diesels came into service and only a little after ten years after the West Coast Mainline had been completely upgraded and electrified. Indeed, no locomotive on the system was more than 17 years old, all freight rolling stock had been replaced, as had much of the coaches and all the local trains, except for the ones on the Southern Region’s three rail electric system.

But there’s to the mistake than even these facts and to illustrate this we need to go back to the origins of the HST itself… And it’s also a good story.

In the late 1960s, even after the upgrade of the West Coast Mainline to full electrification the speeds of the trains and hence the journey times hadn’t changed a great deal. Abroad in Japan you had the bullet trains and in France SNCF had been breaking records using their powerful electric locomotives (but only on specially built high-speed lines). It was seen by the British Rail Board that something needed to be done.

British rail stock, even the fastest, was limited to 100mph running even on the best tracks. This was due to a combination of the network being a general purpose system running both passenger and freight traffic with a meandering track layout imposed by the Victorian builders’ whims and the wheel and suspension technology of the trains. So, it was decided to start a project for a train which could overcome all of these problems and run at 155mph. And so the Advance Passenger Train (APT) project was born.

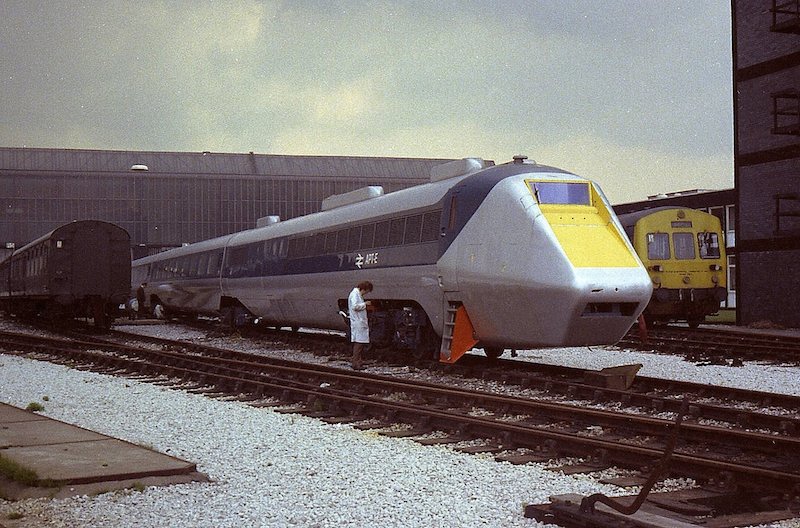
ATP-E (Experimental)

BR decided that the best way of building a new, high technology train was from the ground up. They didn’t want any legacy rail rolling stock builders trying to refine the old designs, they wanted new thinking. So, instead they brought in people from the aero industry to look at the problem from a new perspective.

By 1972, after a great deal of research into wheel design, suspension systems, aerodynamics and coach tilting the first test bed train set arrived on the tracks, the APT-E (experimental). This was a combination of two power cars being powered by gas turbine engines which generated electricity to power the traction motors which turned the wheels plus a couple of “passenger” cars containing all the test equipment. Initially this ran only on the Old Dalby test track near Derby but later visited most of the rail network.

The APT-E was the first actively tilting train in the world. Previous attempts at tilting trains in places such as Italy used a pendulum system but these didn’t work very well. (This is where the name “pendulino” comes from, later used for the current tilting trains on the West Coast Mainline, but more of that later…) The APT-E used hydraulic actuators to rotate the coaches so that the centre of gravity moved inwards on bends, meaning that they could be taken faster without the risk of the train toppling over. It also had the effect of minimising the sideways load on the passengers but this was not it’s primary purpose.

However, even by the time the APT-E made its way onto the rails some within British Rail could see that the APT project was going to take a lot longer than first envisaged and the system needed a stop-gap. This wasn’t a universal view within the British Rail Board and it took a rogue element to start a “skunk works” project using a design team from the traditional rail rolling stock manufacturers. This was the “High Speed Train” (HST) project.

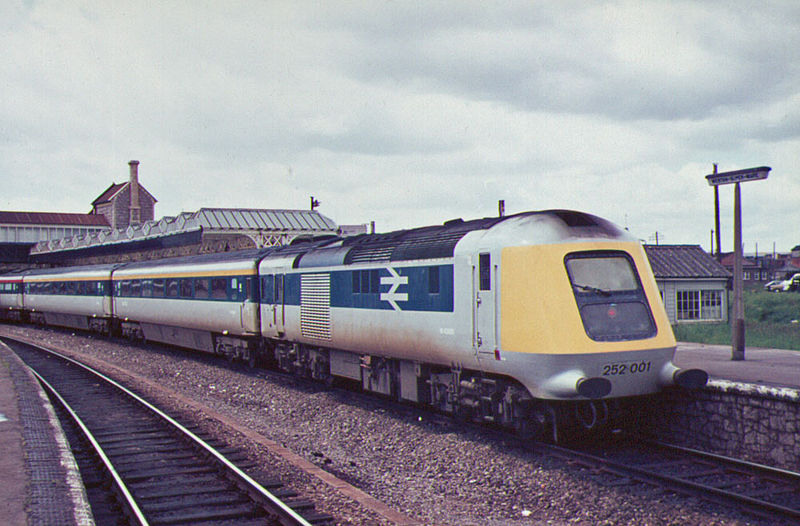
HST PrototypeInitially, the HST project was hidden. The group took a great deal of the fruits of the early research work from the APT project and adapted them to a more traditional railway design. The most important section of the APT design they used was the bogie/suspension/axle set innovation. Previous designs had major problems with oscillating instability above 100mph causing the flanges on the wheels to start bouncing off the rails as the train went along. Not only was this dangerous but also caused massive rail and wheel wear and the forces damaged the bogie frames. The APT researchers had managed to solve these problems. The other innovations included were the use of monocoque structural design and the early aerodynamic work.

By the time the British Rail Board cottoned on that they needed a stop-gap before the APT came into service there was already a prototype HST almost complete, which took to the rails in 1974/75.

The main difference you will notice between this prototype, other than the natty “inverse Inter-City” colour scheme, is the cab design. This Class 252 unit has lights directly under the window and buffers. (Some of the later units had buffers retro-fitted in the 2000’s for some reason.) Other than that and a lower power output, the prototype was almost identical to the first production units.

The go-ahead for production happened pretty quickly after that and the first sets of power cars and Mark III coaches started replacing the expresses on the Great Western Mainline in 1977, these were the Class 253. Two years later the second production run, which had slightly uprated engines and the guards van added, started taking over on the East Coast Mainline, these were the Class 254. The rest is history.

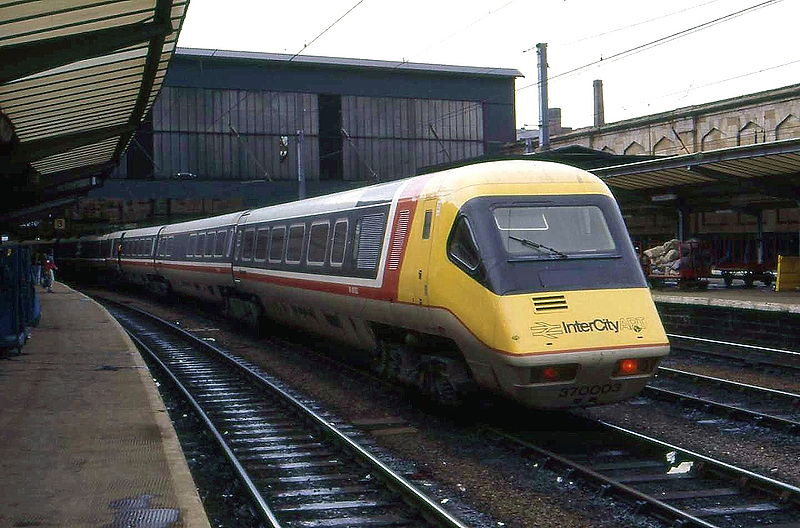
APT Prototype at CarlisleAs for the APT, the project continued with the first few prototype sets of power cars and coaches being rolled out in 1979. Unfortunately, due to political pressure they were forced into passenger service almost immediately and before they’d been used for the purpose they were designed, testing and refining the systems, especially the tilting mechanism which had been redesigned from the ground up to be failsafe, unlike the APT-E’s. This combined with a disastrous P.R. folly of a launch involving plying journalists with as much booze as they could drink and pandering to a minor celebrity (Isla St.Clair) made for a media storm and a political backlash the project never recovered from. (At the time the £1m “wasted” on the APT project was declared a scandal. The French would spend this much on 1km of TGV track in the late 1970s!) Soon after all the bugs in the APT trains and tilting systems had been sorted out in 1985, the trains were withdrawn from service and the patents sold to foreign companies, such as the one which went on to build the Pendolino trains for the West Coast Mainline.


2014 – The year of retro-computing.

For me, other than health issues which I won’t say any more about here, 2014 has been a year dominated by retro-computing sparked off by the call from the Museum of the History of Science in Oxford for exhibits for an exhibition they were setting up.

The call went out in January, a little before my previous post (this is called “irregular” for a reason), and I responded by offering the use of my archive of machines. In the end they took up the offer of a Sinclair QL and a BBC Micro.

Of course, this meant that I had to get the machines down from the loft to check them out, clean them and generally prepare them for the exhibition, which was going to start in May.

The machines themselves proved to be in fine fettle but the floppy disk drives needed a bit of coaxing. The worst problem was that the lubricant used in the 1980s on the drives had mostly dried out to a sticky goo, the opposite of a lubricant. This took a little while to sort out. Another issue was getting a way to display the computers’ output.

My Sinclair QL showing the appalling echoing and smearing on the TV

My Sinclair QL showing the appalling echoing and smearing on the TV

The LCD TV I used in my spare room as a monitor for my server does have an analogue TV input, along with HDMI, SCART, VGA etc. so it shouldn’t be a major problem. However, it’s obvious that the company Dixons/Curry’s chose to build their Sandstrom TVs never actually tested the analogue circuitry very well. Displaying anything with a defined, high-contrast signal produces at best multiple echoes of the point/line across the screen or, at worst, a smeared bright line to the left of the pixels. Not exactly useful for anything other than a quick test.

This problem induced me to have to build new SCART video cables for the machines. A fiddly job at the best of times but not helped by the TV’s insistence in only displaying composite video through the SCART connector unless one pin is energised with 3 volts and with no way of overriding this in the menu system. Quite a pain when the computers required to connect don’t produce this voltage (and it’s not available from the TV’s SCART either). So, a battery box had to be installed and velcroed. What a pain.

Anyway, by the time Easter came I had everything ready and delivery to the museum was planned after I got back from Cornwall. Unfortunately my health intervened and I was stuck down South for rather longer than expected, so missing the deadline for delivery. The museum managed to find a BBC Micro from someone else, along with my friend, Janet’s Beeb so they could set up without my stuff initially.

Thankfully I got back to Oxford just before the exhibition was to begin, so the team from the museum rocked up in a van and collected my QL, screen and floppy and they were deployed just in time for the opening.

Unfortunately I was still too ill to go into town so a friend took a picture of the set-up for me. I was so glad everything had turned out OK.

The Sinclair QL and BBC Micro doing public duty in the "Geek is Good" exhibition. (Sorry for the camera shake.)

The Sinclair QL and BBC Micro doing public duty in the “Geek is Good” exhibition.
(Sorry for the camera shake.)

A few weeks later, after I’d become well enough, I travelled into town myself and took a look at the exhibition, “Geek is Good.” and realised that the materials in the hands-on display area were rather basic and used an arcane BASIC programming example which was really dull and, well, very 1970s.

This spurred me into action. Being too unwell to go into work did allow me some time to use the energy I had to create a set of three programs for the BBC and the QL, exact equivalents in both BASIC dialects, and a crib sheet for program entry, explaining how to edit lines and simplify the typing in using the “AUTO” command. Far better.

All this action at the museum also inspired me to “play” with the other machines in my collection, discovering in the process a few of them starting to die. For example, the Atari TT030 which seems to have developed a floppy controller fault, and the Acorn A4000 ARM machine where the rechargeable  motherboard battery has burst, corroding the tracks and then the power supply died after I fixed this. These are really annoying failures as they’re the rarest of the machines.

The ethernetted Sinclair ZX Spectrums in the basement of the Museum of the History of Science for the "Geek Out!" event.

The ethernetted Sinclair ZX Spectrums in the basement of the Museum of the History of Science for the “Geek Out!” event.

Anyway, I’ve had great fun with all this culminating yesterday with the Museum of the History of Science’s “Geek Out!” event, closing the year with ethernet networked ZX Sepctrums in the basement running games served from a MacBook followed by playing a symphony and BBC Micros in the upper gallery.

The display in the Upper Gallery of the Museum of the History of Science.

The display in the Upper Gallery of the Museum of the History of Science.

I’ve been testing and checking a second BBC Micro for the display all week, duplicating floppy disks of games all ready for yesterday morning. After arriving before 9am with the kit I took it up stairs and attempted to get it working. Hampered by not having the correct monitor cable I soldiered ahead but found that the floppy disk would no-longer read disks. Worse, the other BBC Micro wouldn’t do so either. Even after swapping drives etc. between the machines nothing worked!

To save the day I asked Scott, the exhibition organiser, to get my Sinclair QL out of the store along with the floppy drive and a copy of “Arcanoid II”. The Sinclair saved the day!

A BBC Micro with a board allowing an SD card to be used as a floppy disk drive and my Sinclair QL play games.

A BBC Micro with a board allowing an SD card to be used as a floppy disk drive and my Sinclair QL play games.

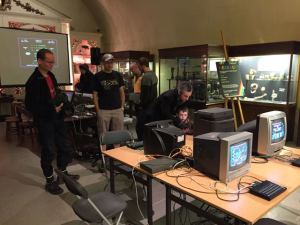
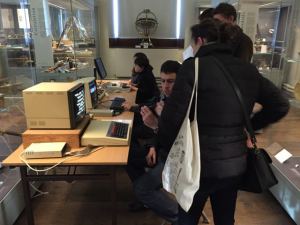
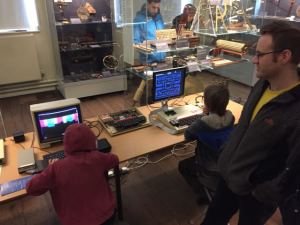
Despite only having two games machines plus a BBC Micro sitting there for people to program upon the day went really well. The crowds were really interested and the kids were having a ball. Surprisingly the BBC Micro set up for programming was as popular as the machines running games. One late teenager, who I think was South American, was fascinated with programming and asked where he might be able to get a BBC Micro. Also, a group of Italian Computer Science students found the machine highly interesting and wondered at how much could be done with so little coding. I think they may be searching for BBC Micro emulators now!

And so, the end of the event came. I didn’t realise how tiring the day had been until I got home. I was shattered and almost fell asleep eating my dinner. Still, it was a good day.

And now, the computers are back in their home in the loft. I’ll probably get the Beebs down one day to try to diagnose the floppy problem but probably not this year. I’ve got other things to do, such as play the sequel to the 1984 smash hit on the BBC Micro, “Elite: Dangerous”!

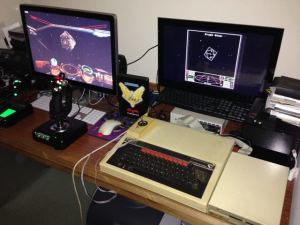
Docking at a Coriolis station in the original Elite on a BBC Micro and in Elite:Dangerous on a PC.

Docking at a Coriolis station in the original Elite on a BBC Micro and in Elite:Dangerous on a PC.

Right on Commanders!


It’s been 30 years since the announcement of an important computing product…

and I’m not talking about the Macintosh.

QL Launch Macintosh Launch

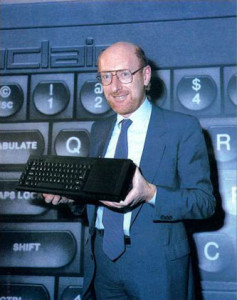
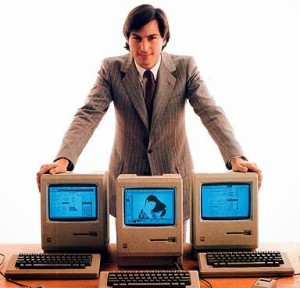
In the news at the moment there’s been a number of stories about the launch 30 years ago of the Apple Macintosh with its flash media event and slick marketing “Big Brother” advert. However, two weeks previously in a lower key event a 3rd of the planet away in a London hotel there was another event, another launch of another computer which is rather less well known but was a breakthrough in many ways and the stepping stone to other, greater things.

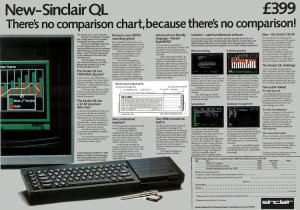
QL-Flyer-1984-Inside

The inside of the original flyer advertisement distributed inside magazines in January 1984.

1984-02-04_PCN_Sinclair_QL_advertisement_doublepage-SCN04-pimped1984-02-04_PCN_Sinclair_QL_advertisement_doublepage-SCN04-pimped1984-02-04_PCN_Sinclair_QL_advertisement_doublepage-SCN04-pimpedNow the Sinclair QL was in many ways a flawed design, mostly due to some really silly design decisions such as using the 4 bit Intel co-processor to do keyboard input, sound output and serial port input. This poor, underpowered chip could just about do one of those jobs at a time but not two, which meant that if you played a sound you couldn’t read the keyboard properly and you certainly couldn’t accept any data on either of the serial ports.

However, this ignores what it did provide. It was the first “affordable” 16 bit computer system with a fully pre-emptive multitasking, modular operating system. It may have been aimed at the business consumer, a boat long sailed by this point, but it found a niche in the programming community.

A Mac Plus I rescued.

A Mac Plus I rescued.

Now, you may be screaming by this point, “But the Macintosh was far more influential and it’s still here!” Well, I’d agree that the Mac did bring a huge leap forward in usability and design, for a price. However, the machines which are sold as Macs now have very little to do with that cream box with a handle and a screen launched all that time ago. MacOS now is not a descendant of that original Mac operating system at all, it’s a direct descendant of NeXTstep, the BSD UNIX derived OS running on the NeXT Cube, from Steve Jobs’ other company. Even Postscript and the other innovations didn’t come along with the first release of MacOS, they happened later when the Laserwriter was created. It should also be remembered that the Macintosh was not the first computer marketed which had a WIMP environment and a mouse, there was the Apple Lisa before it. In many ways the Macintosh was the Lisa-Lite and most of the launch applications were quick ports of the Lisa applications.

On the matter of cost, when the Macintosh was released it may have been affordable to a few in the USA but it was well beyond anything the normal person in the UK could afford. If you could find an Apple dealer the price of a Macintosh started at around £1300 and went up steeply if you wanted to actually do anything. This is why they were so rare. The first one I saw was in 1988 in the Pi Magazine office, University College London.

On the other hand, the Sinclair QL was launched at £399. This was still a huge outlay, being half to two thirds the monthly wage of a normal person, but at least you could use your TV as a display, it came with applications and, if you had a printer, could usually be cheaply hooked up to it. Sure, you could spend a whole lot more on a monitor and a printer but you didn’t need to.

Now, in many ways the QL was a bit of a flop, especially if you look at it relative to the ZX Spectrum. However, those machines which did go out there had a remarkably high impact in the longer term, even if it wasn’t at all visible.

Without the QL would there have been Linux? Linus Torvalds cut his teeth on one, got a little frustrated by the restriction and decided to write his own operating system. QDOS, for all its advanced features and modularity is no UNIX and it was written in a hurry, I can see how Linus may have seen the problems, but it was, in the end his muse and impetus.

The QL was also the development platform for the first version of AmigaDOS. Without the QL the Commodore Amiga would have been a very different machine to use. Metacomco in Bristol was contracted to build an operating system for the fledgling machine and because they had been early to support the QL, building compilers for it, they had the M68000 expertise and the tools for the job. AmigaDOS itself was a re-implementation of Tripos, an operating system developed in Cambridge, UK. and written in BCPL. Seeing as Metacomco already had their own BCPL compiler for the QL it was a perfect match. Later versions of the OS were re-written (mostly because Metacomco weren’t actually THAT good coders all told).

Anyway, I’d like to wish a very happy birthday to both the Sinclair QL and the Apple Macintosh. You both advanced computing in your own little ways. Both still have active communities (though the QL’s is “somewhat” smaller). May your legacy go on another 30 years.

The Sinclair QL I'm currently starting to prepare for an exhibition.

The Sinclair QL I’m currently starting to prepare for an exhibition.

I’m currently preparing one of my two QLs (the one I rescued from being recycled by the Oxford University Physical Chemistry department) as a hands-on display in an exhibition at the Oxford Museum of the History of Science which will be happening later this year.

By the way, if you have a QL in need of a few spare parts, take a look at “Sell My Retro”.

systemd is pants!

OK, let’s get this out in the open… systemd is *PANTS*

Phew! That’s better.

I’ve just spent most of the day trying to get a Linux system to reliably mount a disk attached via iSCSI over ethernet at boot time and, more importantly, to reliably get it to be unmounted at shutdown before the network rug is pulled from beneath it.

Now, in the days of the init scripts it was pretty easy to stuff a script in-between the networking coming up and nfs-server starting. It was also dead easy to make sure that your script ran at shutdown before the iSCSI and networking were closed down as well.

Now, with systemd the first part is more tricky as the program tries to do everything at once. If you want to have a native systemd service which starts before nfs-server then you have to modify that service description too. You might as well just have an init script which runs last which shuts down nfs-server before mounting the iSCSI disk and then starts it again when it finishes.

Now, it gets worse when the system is shutting down. Oh yes!

You see, systemd always tries to do things in a hurry. It seems that the design philosophy was better to do things quickly rather than correctly, and this is especially true at shutdown.

In a discussion thread on the systemd-devel mailing list titled “[systemd-devel] systemd and LSB Required/Should-Stop” it’s stated by Lennart Poettering:

On Fri, 24.06.11 14:04, Ville Skyttä (ville.skytta at iki.fi) wrote:

> Hello,
> 
> Am I right that systemd does currently have no support for the LSB
> Required-Stop and Should-Stop keywords?  If yes, are there plans to
> support them in the future?

That is true, we do not support this right now. In systemd the shutdown
order is always the inverse startup order of two services. I am not
entirely opposed to make this more flexible but so far I have not heard
of a good usecase where the flexibility to detach the shutdown oder from
the startup order was necessary.

Now, what this means is that any program or script called during the shutdown process is in a race to complete before the services it depends upon disappear. There is no ability to pause the shutdown to wait for vital events to happen, such as the synchronising and unmounting of disks. This is completely broken, by design.

Emulating a Sun.

A week ago, after completing the installation of a Raspberry Pi into an old Sun CDROM drive external enclosure, I posted a picture of the enclosure on Facebook. The response from an old friend was, “Can you run SunView on it?”

20130825-193902.jpg

Of course, a Raspberry Pi is no Sun Workstation so, the answer was, not directly. However, I immediately did a Google search for Sun emulators and was very surprised to find that someone had actually written one. And so my project for the next week was born.

After downloading the source to TME (The Machine Emulator) and installing all the development libraries I tried to build the blighter. Unfortuately this was not as simple as you may have thought as the configure script had a bug which only showed itself if not on a x86 machine. This and the build system’s requirement for an ancient version of the libltdl module loading library for libtool took me nearly three days to work through. Still, I did now have a binary to play with.

It was then time to try it out. Somewhat sillily I followed some instructions I found on the Internet. These instructions included how to create a disk image file and then how to configure it from within the “tape” booted kernel’s format command. Following these instructions caused the emulator to Bus Error and crash when it tried to write to the virtual disk for the first time. I wasted a day trying to debug this… but it turned out that the instructions were wrong!

Having gone back to basics and used the size and parameters from a Seagate ST1480N disk, used in the SPARCstation 2, I was able to format, partition and install the miniroot. I thought this was the end of my problems… until I tried to install the OS.

The “suninstall” program just refused to be able to seek to the correct tape file for the installation files even though mt(1) worked perfectly. Puzzling. Another number of hours trying to find why this wasn’t working and I find that the VM config file needed parameters removing from the tape drive definition as the default only worked with NetBSD as the OS and not SunOS. :-/

Everything seemed good. After a couple of hours I had a working VM on the Pi and it didn’t even seem that slow. So, I logged in and started SunView. Woohoo! Task complete, almost. The mouse emulation didn’t work properly. I thought that maybe it was due to the VM running too slowly to read the input correctly. Still, I could a least post “task complete” as I did have SunView running, which is what Richard had asked.

20130825-194105.jpg

It now took me another day or so of debugging to determine that the Mouse Systems mouse emulation was broken when encoding the movement delta values. The original code seems to require the compiler to pretend that hex values are signed integers when assigning to unsigned 8 bit integers. Well, dodgy!

Having fixed that bug all now works, if rather slowly.

Given the interest on Google+ and Twitter about this emulation I’ve spent today creating an automatic download, configure and build script with an easy to use prototype VM creation system for an emulated Sun3 running SunOS 4.1.1, which you can download here.

On the Origin of Technological Civilisation.

This morning a friend posted an image of a supernova on Facebook and wondered just home many civilisations died as a result. Now, if you take the standard Drake equation and use that as a basis of your estimation of technological life and hence civilisation then you may get the idea that at least one did, given the massive gamma ray bust associated with such an event. However, I don’t believe this at all, and here’s why:

The parameters usually plugged into the Drake Equation assume that eventually that the development of technological lifeforms is almost inevitable once you get life going, as is even the equivalent of multi-cellular and complex lifeforms before this. Given my perspective as an Earth Scientist by training and hence knowledge about how the Earth, the only place we know life exists, I very much dispute these assumptions.

Life is common, complex life probably not so much

If we look at the Earth as an example of how life may develop on a planet we find from the evidence that simple, single celled life appeared pretty darned quickly after the end of the late bombardment where it would have been practically impossible for anything to survive. So, we can assume that this kind of life is probably likely to spring up almost anywhere in the Universe given similar starting conditions. So, life in the Universe is common.

However, after this great “leap” life got lazy. It didn’t really change a great deal for over 2.5 billion years. OK, it had to cope with the rise in oxygen and switch power sources but otherwise it didn’t do a great deal other than maybe become symbiotic and file its DNA away into a special container. Basically, there was no evolutionary massive advantage to change, so it didn’t.

From the fossil record it currently looks as though a global climatic event effectively pushed life to co-operate so as to survive in challenging environments. Without this push, life on Earth would probably still be single celled.

So, just about a billion years ago we got multi-cellular life… Woo-hoo! It took a while before this became complex though and it seems that only when some of these found eating other life to be a convenient method of energy collection did the arms race begin and complex life began.

It was all a big accident!

Climbing the ladder to technology? Maybe not.

So, from this slow start it only took about 500 million years to get to creatures which could potentially have enough brain power to be intelligent enough to wield tools. So, why didn’t we see technological dinosaurs?

Well, technological intelligence requires a couple of things, firstly the abstract, innate intelligence and flexible world modelling capabilities so as to visualise the tool and make the imaginative leap to think them up in the first place. Secondly, you need the twist of evolutionary fate which gives the organism the body parts required to fashion and use technology.

It’s becoming more and more apparent that many creatures from many strands of life are capable of the first part. Not only great apes or primates or even mammals but birds (i.e. dinosaurs) and even molluscs (Cephalopoda, i.e. octopus). However, most of these intelligent beings are handicapped so that technological advancement isn’t practical. They either don’t have the tools, don’t have the time, live in the wrong sort of environment or aren’t social.

Also, in many ways, the pre-requisites for being technological aren’t usually the best for long-term survival in an evolutionary sense. Generalists generally find it hard to compete against specialists, unless there are specific environmental drivers which cause the specialists to fail. Humans almost didn’t make it.

So, humans are an accident?

Basically, yes. We are an aberration. We only made it as a sheer fluke. Given the odds we shouldn’t be here at all and the planet Earth would be no different than it has been since the last great extinction.

So, what does this mean for the Drake Equation?

We have to remember that we’re looking down the wrong end of the telescope at this problem and hence get a very skewed idea. We are here to observe and hence is seems that that must be proof of the inevitability of us appearing. The original parameters of the Drake Equation reflect this and are, in my opinion given the evidence, several tens of orders of magnitude too optimistic.

Well, even given the hugely, mind bogglingly big numbers of potential life harbouring planets out there it’s very probable that only a really, really tiny percentage managed to get beyond single cellular organisms. Even then the combination of factors which would allow a society to develop technology and become a civilisation are so remote and actively discouraged.

Is there anyone else out there then?

Probably not. Sorry.

Given the odds it’s quite possible that we are the very first technological beings to exist within the Universe, given that the Sol system was possibly one of the first to appear after enough building blocks had been created by the previous generations of stars.  Even if we are not, given the number of star systems out there, the time scales involved and the probable life of any species being only a couple of millions of years at best we’ve probably missed the previous ones and others will appear after we’re long gone.

We are but a fleeting island in entropy’s march.

Openindiana: How could the developers go so wrong?

Well, today I’ve been playing with OpenIndiana, the OpenSolaris derivative created after Oracle killed off its ancestor.

Well, to say that I was rather disappointed would be an understatement. It’s rather obvious that the developers of the distribution are not system administrators of integrated networked environments otherwise they would not have made such stupid design decisions.

Anyway, here’s the story of my day:

I downloaded the live DVD desktop version initially as I assumed that this would, when installed, effectively replicate a Solaris desktop environment. Seeing as Solaris in this configuration is capable of being a fully functional server as well I assumed that this would be the case for Openindiana.

So, I created a virtual machine under VirtualBox on the Mac, booted the DVD image and started the install. I was surprised about how little interaction there was during the install process as all it asked about was how to partition the disk and to create a root password and a new user. After the install things went down hill.

Now, it seems that the Openindiana bods are trying to ape Linux. When you boot up you get a GDM login screen, but can’t log in as root. So, you log in as the user you created, not too much of a problem, except that you now can’t start any of the configuration applications, they fail silently after you type the root password. You can’t sudo commands as it says that you don’t have permission…

Finally, I managed to get past this roadblock by trying ‘su –‘ which then asked me to change the root password! Once this was done I could actually run the configuration utilities. Not that it got me very much further, as there seems to be no way to set a static IP address out of the box.

I decided to trash that version and download the server version DVD. Maybe that would be better? Surely it would, it’s designed to be a server…

I booted the DVD image and the text installer started, very similar to the old Solaris installer to begin with, except all it asked about again was the disk partitioning, root password/user creation and networking, giving only the options for no networking or automatic network configuration. There was no manual network configuration! What?!!!! This is a server install!

Also missing from the installer was any way of setting up network authentication services or modifying what was installed. The installer had been lobotomised.

Once the OS had installed and booted up there were some more nasty surprises. Again, you couldn’t set a static IP address and any changes to the networking were silently reverted. It was only with some Googling that I managed to hunt down the culprit, the network/physical:nwam service, which is the default configuration. WHY?!!! This is a SERVER not a laptop!

Once this was fixed I managed to at least get a static IP address set up but it’s far more convoluted than with Solaris 10 or before.

Other strangeness in the design… All the X installation is there, except for the X server. Eh? What’s the point of that?

By default the GUI package manager isn’t installed. Once you do, however, it’s set up by default not to see any not installed packages, which is confusing. If you know where to look you can change this but it’s a stupid default.

Getting NFS client stuff working was a challenge as well. When you manually run mount everything seems to work out of the box. NFS filesystems mount fine and everything looks dandy. So, you put some mounts into /etc/vfstab and ‘mount -a‘ works as expected. Reboot, however, and nothing happens! This is due to the fact that most of the NFS client services are not turned on by default but magically work if you run mount. Turning on the nfs/client:default service doesn’t enable the other services it requires, however, but you don’t see this until a reboot. Stupid! It should work the same way at all times. If it works magically on the command line it should work at boot as well and vice versa. Unpredictability on a server is a killer.

On the bright side, at least the kernel is enterprise grade.